Waterproofing

Water will always find the path of least resistance… sometimes this leads right into your basement. When this happens, it is important to address all aspects of the problem. If only one portion of the problem is attended to and other aspects ignored, water will find it’s way back. Tackling all of the issues, thoroughly, is the surest way of stopping water penetration problems permanently. Our proven work will keep water out of your basement for good.

Waterproofing the exterior of your home will provide you the best protection against water leaks and protect the foundation and the walls of your home from cracking,

Our waterproofing experts are ready to answer any questions you might have about the process and can inspect and assess your property to provide you with the best solution to protect it.

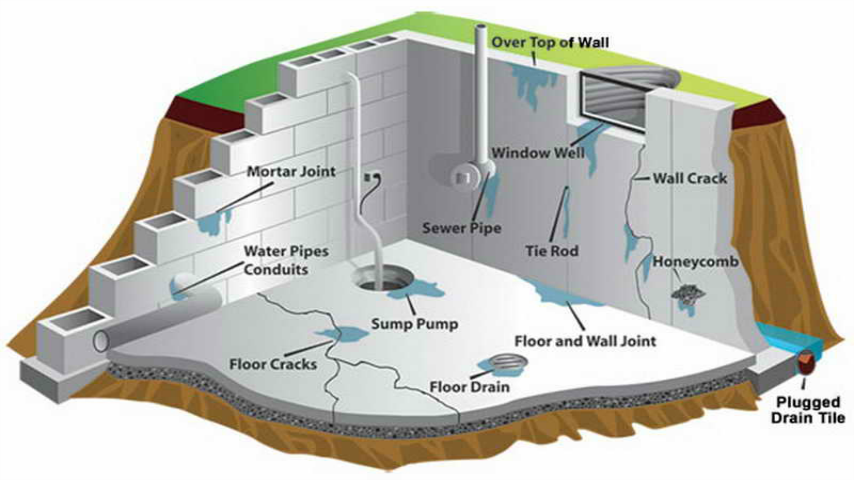
Here are few illustrations on how water can damage your basement and home foundation:

Exterior Waterproofing Process

E

1. Exterior waterproofing requires excavation around the perimeter of the building.

Most excavations range from 4 to 8 feet deep and approximately 2 ½ feet wide. The dimensions of the excavation are dependent on the elevation of your property.
E

2. Installation of Speed Shoring.

This is done to ensure the safety of workers while preventing soil re-filling the area of excavation.
E

3. Old Weeping Tiles are Removed.

Excavation is done util the footing is reached and the old weeping tile can be taken out. A new 4-inch weeping tile with a filter cloth is then installed.
E

4. Cleaning and Inspection of the Foundation Walls.

Foundation walls are then cleaned and inspected for any voids or structural cracks. The defective areas are chiseled out and repaired with non-shrink specialized cement which expands when applied to the crevices.
Application of Trowel-On Rubber Membrane
E

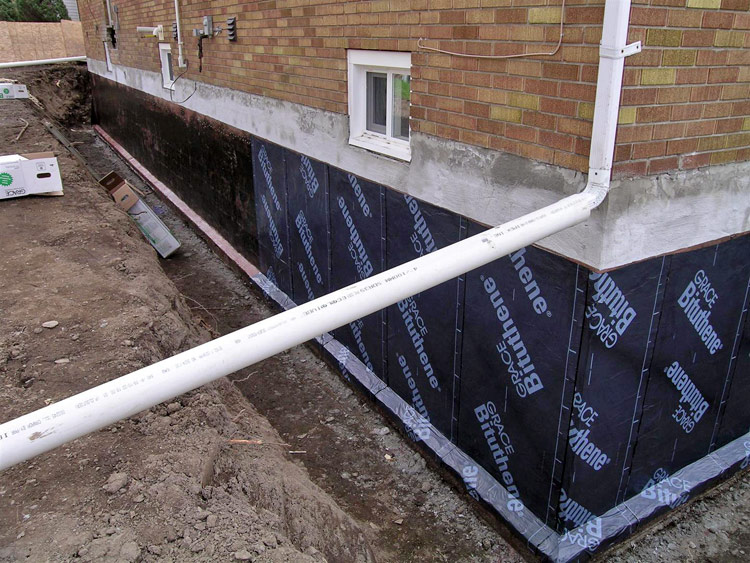
5. Application of Trowel-On Rubber Membrane.

This is a central component to exterior waterproofing your foundation. Its designed to elongate and expand in case of further foundation movement and settlement.
E

6. Installation of mesh on top of membrane and final layer of rubber waterproofing.

This is used to reinforce the first layer of the rubber membrane and acts as a secondary rubber layer.
Installation of mesh on top of membrane and final layer of rubber waterproofing.
E

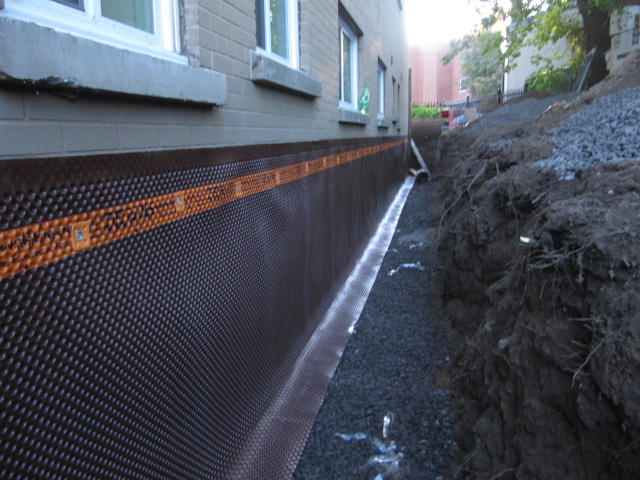
7. Soil side drainage sheet is fastened to the top of termination bar.

Commercial grade drainage acts as a protection board and drainage membrane (much better than residential grade dimple board).
E

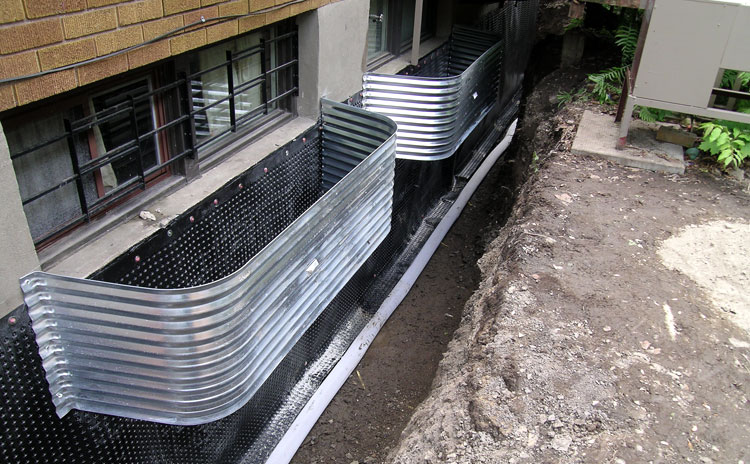
8. Installing Window Wells.

If your home has any windows below grade and you require a window well installed. A 4-inch weeping tile is installed vertically down from the inside of the window well to the footings. To prevent clogging, makes sure your weeping tile and pipe do not touch.
E

9. A layer of 3/4 inch clear gravel is placed over the weeping tile.

Used to maximize the level of drainage. The layer of gravel is mixed with soil to prevent too much water absorption through the weeping tile, which could lead to slowed drainage or clogging.
Installing Window Wells.
E

10. Area is refilled with native soil and compacted to the original level.

Once the soil has been restored to its original places, you have fully waterproofed your foundation and will have no further issues with water penetrating your basement exterior or interior.
Application of Trowel-On Rubber Membrane
Installation of mesh on top of membrane and final layer of rubber waterproofing.
Installing Window Wells.

F.A.Q.

Here are some of the most frequently asked questions, if you have a question, feel free to ask us and we will get back to you as quickly as possible.
What areas do you service?
The Alps Roofing & Construction services Toronto, Mississauga, Etobicoke, Brampton, North York, Richmond Hill, Vaughan, Oakville, Burlington, Milton, Stoney Creek, Waterdown, Hamilton and more.
How long does the waterproofing process take?
The estimated time of completing an exterior waterproofing varies. It depends on the size of the house, whether there is an existing damage on the foundation or any leaks.
How can I tell where the water in my basement is coming from?
Water and moisture enter a building’s foundation through a number of different ways. The most common is at the point where the basement wall and basement floor meet (cold joint). There are other ways water can enter a foundation, though not as easily noticeable. Give us a call today and our experienced team can inspect and determine where the leak is coming from.

GET AN ESTIMATE

Roof Emegency ?

We are available 24/7 to respond to your roofing emergencies.